モバイルアプリでアニメーション骸骨動画を作る手順ガイド
はじめに
今日のAIoTエコシステムにおいて、リアルタイム映像を用いたコンピュータビジョン・アプリケーションではプライバシーを確保しつつ、魅力的なユーザーインターフェースを構築することが重要になっている。本記事では、React Nativeを用いてモバイルアプリ上にアニメーションの骸骨(スティックフィギュア)動画を作成する方法を解説し、スムーズな遷移やインタラクティブな要素を通じてユーザー体験を高めることを目指す。
前提条件
実装に入る前に、以下のツールとフレームワークがインストールされていることを確認する。
- Node.jsとnpm: ダウンロード: nodejs.org.
- React Native CLI: npmを使ってグローバルにインストール
- react-native-reanimatedライブラリ
インストールとセットアップ
React Native CLIのインストール
npm install -g react-native-cli新規React Nativeプロジェクトの作成
新規React Nativeプロジェクトの作成
npx react-native init AnimatedSkeletonAppcd AnimatedSkeletonAppReanimatedライブラリのインストール
npm install react-native-reanimated更新 babel.config.js
Reanimatedのプラグインを追加する。
module.exports = {
                                     presets: ['module:metro-react-native-babel-preset'],
                                     plugins: ['react-native-reanimated/plugin'],
                                 };
アニメーション骸骨コンポーネントの作成
作成 WalkingMan.js コンポーネント
新しいファイル WalkingMan.js を作成し、以下のコードを追加する。
import React, { useEffect } from 'react';
import { View, StyleSheet } from 'react-native';
import Animated, {
  useSharedValue,
  useAnimatedStyle,
  withTiming,
  withRepeat,
  withSequence,
  Easing,
} from 'react-native-reanimated';

const WalkingMan = () => {
  const leftLegRotation = useSharedValue(0);
  const rightLegRotation = useSharedValue(0);
  const leftArmRotation = useSharedValue(0);
  const rightArmRotation = useSharedValue(0);

  useEffect(() => {
    const rotationSequence = withRepeat(
      withSequence(
        withTiming(30, { duration: 500, easing: Easing.linear }),
        withTiming(-30, { duration: 500, easing: Easing.linear })
      ),
      -1,
      true
    );

    leftLegRotation.value = rotationSequence;
    rightLegRotation.value = rotationSequence;
    leftArmRotation.value = withRepeat(
      withSequence(
        withTiming(-30, { duration: 500, easing: Easing.linear }),
        withTiming(30, { duration: 500, easing: Easing.linear })
      ),
      -1,
      true
    );
    rightArmRotation.value = withRepeat(
      withSequence(
        withTiming(30, { duration: 500, easing: Easing.linear }),
        withTiming(-30, { duration: 500, easing: Easing.linear })
      ),
      -1,
      true
    );
  }, [leftLegRotation, rightLegRotation, leftArmRotation, rightArmRotation]);

  const legStyle = (rotation) => useAnimatedStyle(() => ({
    transform: [{ rotate: `${rotation.value}deg` }],
  }));

  const armStyle = (rotation) => useAnimatedStyle(() => ({
    transform: [{ rotate: `${rotation.value}deg` }],
  }));

  return (
    <View style={styles.container}>
      <View style={styles.body}>
        <Animated.View style={[styles.leg, legStyle(leftLegRotation)]} />
        <Animated.View style={[styles.leg, legStyle(rightLegRotation)]} />
        <Animated.View style={[styles.arm, armStyle(leftArmRotation)]} />
        <Animated.View style={[styles.arm, armStyle(rightArmRotation)]} />
      </View>
    </View>
  );
};

const styles = StyleSheet.create({
  container: {
    flex: 1,
    justifyContent: 'center',
    alignItems: 'center',
  },
  body: {
    width: 20,
    height: 100,
    backgroundColor: 'black',
    position: 'relative',
    alignItems: 'center',
  },
  leg: {
    width: 5,
    height: 50,
    backgroundColor: 'black',
    position: 'absolute',
    bottom: 0,
  },
  arm: {
    width: 5,
    height: 50,
    backgroundColor: 'black',
    position: 'absolute',
    top: 0,
  },
});

export default WalkingMan;
コードの解説
- 共有値(Shared Values): 脚と腕の回転を制御する4つの共有値を作成する: useSharedValue to control the rotation of the legs and arms.
- アニメーションのシーケンス: 用いて withRepeat と withSequence、脚と腕を前後に回転させ、歩行を再現する
- アニメーションスタイル: useAnimatedStyle を用いて、共有値に基づいて回転する脚・腕のスタイルを作成する
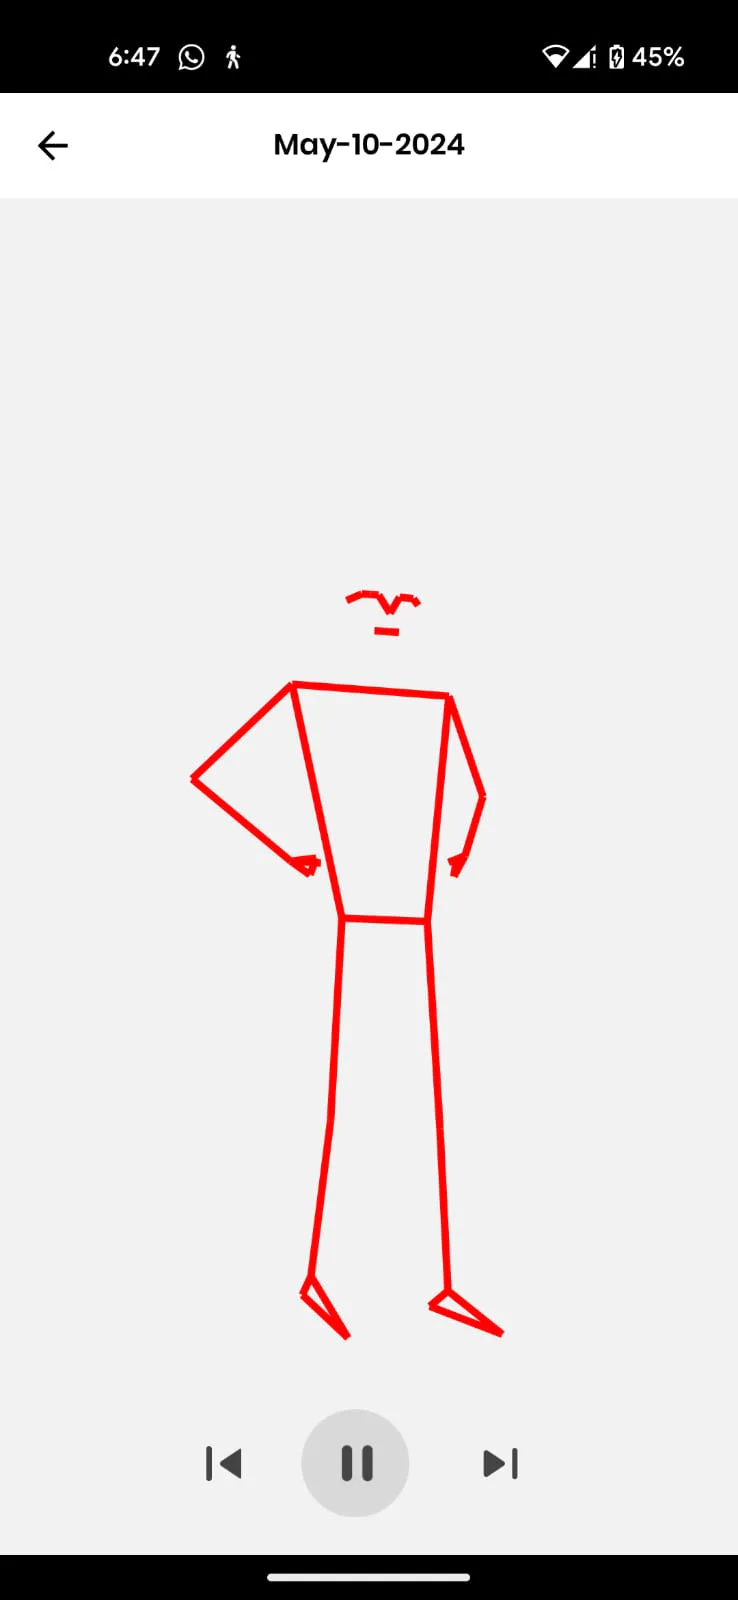
- スティックフィギュアの構造: 胴体用の View 1つと、脚・腕用の4つの Animated.View でシンプルな棒人間を構成する。脚と腕は胴体を基準に配置され、歩行動作をシミュレートするようアニメーションが適用される
App.jsでの利用
内容を置き換える: App.js 以下のコードで WalkingMan コンポーネントを利用する。
import React from 'react';
import { View, StyleSheet } from 'react-native';
import WalkingMan from './WalkingMan';

const App = () => {
    return (
    <View style={styles.container}>
         <WalkingMan />
    </View>
    );
};

const styles = StyleSheet.create({
    container: {
    flex: 1,
    justifyContent: 'center',
    alignItems: 'center',
    },
});

export default App;
アプリの実行
エミュレーターまたは実機でアプリを実行する。
Androidの場合:
react-native run-androidiOSの場合:
react-native run-ios実行結果
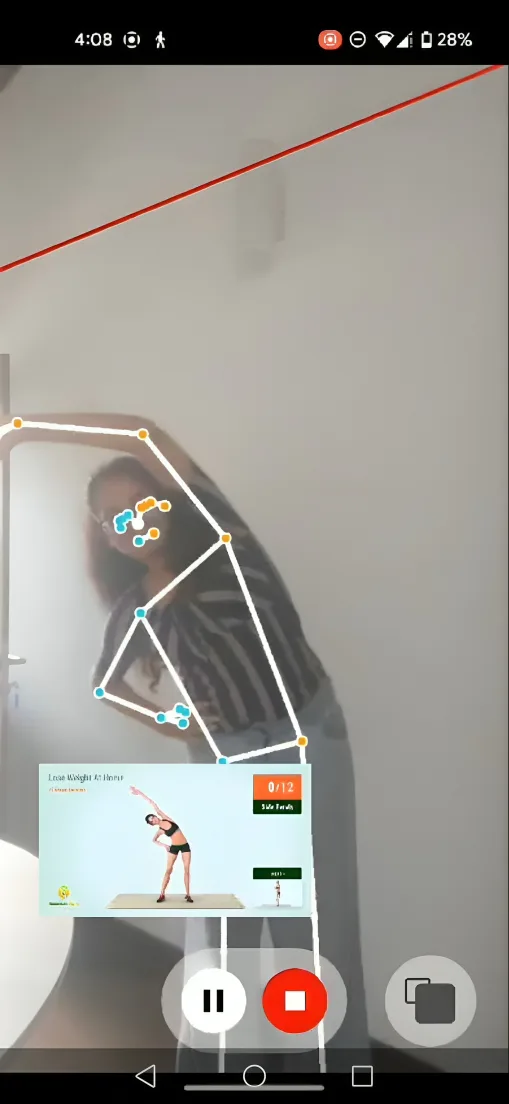
このアプリを実行すると、脚と腕が前後に動くシンプルな棒人間が表示され、歩行の様子が再現される。これは react-native-reanimated ライブラリを用いることで、滑らかで高いパフォーマンスのアニメーションとして実現されている。
まとめ
本ガイドに沿って進めることで、React Nativeと react-native-reanimated ライブラリを用いて、モバイルアプリ内にアニメーション骸骨動画を作成できる。これにより、コンピュータビジョンを活用したアプリケーションにおいて、滑らかな遷移やインタラクティブな要素を通じてユーザー体験を向上させることができる。
 次に読む
次に読むバッテリー駆動デバイスの消費電力最適化
IMUモーションデバイスの電池寿命を延ばすための部品選定、基板設計、ファームウェア上の工夫。
記事を読む
リーファー監視向けLoRa
低消費電力のリーファー監視にLoRaが向く理由と、長距離のコールドチェーン遠隔計測への使い方。
記事を読む
BLEによるファームウェア更新
BLE経由のOTAファームウェア更新の仕組み。ブートローダー、パケットフロー、失敗時の復旧まで。
記事を読む
屋内フォークリフト位置測定
GPSの代わりにBluetooth Low Energyビーコンを使い、屋内でフォークリフトの位置を測る方法。
記事を読む
Wi-Fiネットワークの暗号技術
暗号技術の基礎と、それが今日のWi-Fiネットワークの安全性をどう支えているかの実践的な解説。
記事を読む